


Step into the vibrant realm of heat transfer paper–your secret weapon to transform the mundane into the extraordinary. For every kind of Transfer Ninja, from print professionals to crafty creators, transfer paper is the key to unlocking powerful customization abilities.
This guide puts you on the fast track from beginner to blackbelt. We unravel the mystery of different types of heat transfer paper, delve into different approaches, and arm you with expert tips to achieve flawless results on your path to transfer mastery. Let's begin.
How does heat transfer paper work?
Heat transfer paper is a specially designed paper that allows you to transfer designs onto various materials by applying heat and pressure. The paper is coated with a unique heat-sensitive substance that responds when heat is applied, enabling the design to adhere to the fabric or surface.

How to use heat transfer: The basic steps
- Print your design onto heat transfer paper
- Cut around the design (if needed)
- Position printed transfer paper on the material
- Apply certain amounts of heat and pressure
- Peel away the paper or film to reveal the design
Although the various types of heat transfer paper share these steps, each kind has its own features and special considerations, which should inform how you approach the process.
Different types of heat transfer paper and how they work
Heat transfer papers are designed for different applications and printer technologies. Make sure you have the appropriate paper and printer for your project. Here's a quick look at the four main types and how they work.
Inkjet transfer paper
This paper type, crafted for inkjet printers, is coated with a layer of specialized ink-absorbing emulsion. It relies on liquid-based ink sprayed onto the paper, which holds the design in the emulsion layer. Upon applying heat and pressure, the emulsion with the ink is released from the paper and bonds with the fabric. There are two variants: one for light fabrics, where the transfer is transparent, and one for dark fabrics, which includes an additional opaque layer to prevent the fabric color from showing through the design.
Laser transfer paper
This paper is designed for laser printers, which use toner—a powder—instead of liquid ink. The toner is fused onto the paper's surface using heat in the printer, creating the design on a specialized heat-resistant coating. This coating melts upon heat pressing and bonds the toner to the fabric. Variants exist for light and dark fabrics, with dark fabric transfers including an extra white layer for color vibrancy.
Sublimation transfer paper
This paper is the key component of dye-sublimation printing, employing heat-sensitive ink. When heated, this ink transforms directly from a solid to a gas, bypassing the liquid stage. The gaseous dye then permeates the polymer fibers of the substrate, permanently dyeing them. As such, this method is primarily used on polyester fabrics or polymer-coated items, where the dye can effectively bond.
DTF (Direct-To-Film) transfer paper
DTF, or Direct-to-Film printing, utilizes a unique film-based transfer process. Here, a layer of adhesive powder is applied over the printed design on a PET film. This adhesive layer activates with heat, transferring the printed design directly to the fabric. This method allows for full-color transfers without weeding, making it a highly versatile option compatible with various fabric colors and types.
For a more comprehensive look at the various transfer papers, check out our complete guide to heat transfer paper. To understand more about the printers used with these types of papers, consult our guide to heat transfer printers.
Using a heat press, Cricut, or home iron for heat transfer paper
Using heat and pressure is an essential step in creating successful transfers. Each of the following tools can work well if used properly:
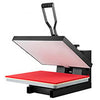
Heat press: Known for delivering professional and enduring results, the heat press is the mainstay tool for heat transfers. Its uniform heat and pressure distribution gives transfers a top-notch finish. Adjust temperature, pressure, and timing settings based on your transfer paper's instructions.
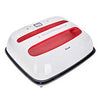
Cricut EasyPress: The perfect blend of power and flexibility, the Cricut EasyPress is the ultimate tool for hobbyists and small businesses. Its compact design doesn't compromise performance. Consistent movement and equal pressure during application will yield the best results with EasyPress.
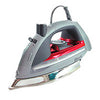
Home iron: Ideal for beginners or those on a budget, a home iron can yield satisfactory results with a little extra patience. To get a good transfer, apply even pressure and consistently move the iron over the design, especially at the edges. Do NOT use steam.
How to use different types of transfer paper
Using different types of transfer paper is an art, and each type has unique techniques. Whether it's Inkjet or Laser Transfer Paper for light or dark fabrics, Sublimation Transfer Paper, or DTF transfers, understanding how to use each type can transform your heat transfer results. In the following sections, we'll guide you through each process, offering expert tips and insights to help you master the art of heat transfer.
Inkjet or laser transfer paper on light fabrics
Inkjet or Laser Transfer Paper can produce dazzling, vibrant designs when used on light-colored fabrics. Here are the unique aspects you need to understand to get the best results:
- Mirror the design: Unlike working with dark fabrics, you must mirror your design before printing it on transfer paper meant for light fabrics. Mirroring ensures that the design appears correctly when transferred onto the textile.
- Print on the film side: Ensure you're printing on the film side of the transfer paper, not the backing. Getting this wrong can cause damage to your printer and result in a botched transfer.
- Cutting: You must cut out your design with light fabric transfer paper, leaving a small border. This step is crucial as any uncut unprinted areas can transfer as a semi-transparent film on the fabric, slightly changing its texture.
- Cool peel: Unlike some transfer papers, those for light fabrics often require a 'cool peel' process. After applying heat, let it cool completely before peeling off the backing paper. Rushing this step can result in a damaged design.
- Curing: After the transfer, it's necessary to 'cure' the design, which essentially means applying heat again to help set the design into the fabric and boost its durability. Not all types of transfer paper require this step, but it's crucial for transfers on light fabrics.
Inkjet or laser transfer paper on dark fabrics
When using Inkjet or Laser Transfer Paper on dark fabrics, there are some unique considerations to remember. Here's a deeper look into the process and its nuances:
- No mirroring required: Unlike transfer papers for light fabrics, those designed for dark fabrics do not require you to mirror your design. You print the design as it is, which simplifies the design process.
- White underbase: These transfer papers include a white underbase which helps your design maintain its vibrancy against the dark background. An underbase layer differs from transfer paper for light fabrics, which doesn't have this feature.
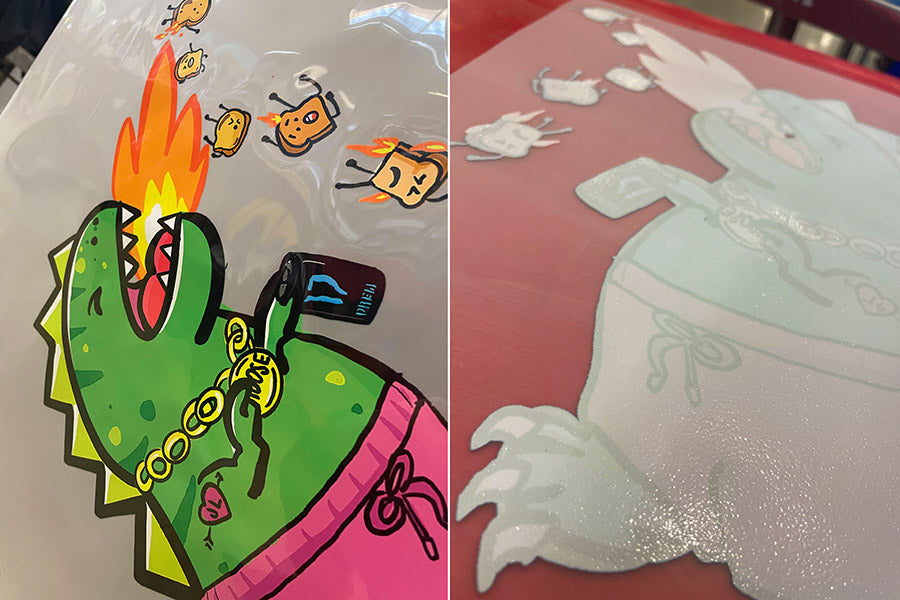
- Weed the design: After printing, you must remove or weed any unprinted areas. Unlike transfers for light-color fabrics, any remaining unprinted areas will appear white on the material due to the white underbase not being clear.
- Application process: The application process is a bit different. After placing the design on the fabric, the transfer paper's backing is typically peeled off after placing the design on the material before applying heat.
- Warm peel: Once the heat is applied, these transfers usually require a 'warm peel' process, which means peeling off the transfer while it's still warm, unlike the cool peel process for light fabrics.
Sublimation transfer paper
Sublimation Transfer Paper stands out from other types in several ways, primarily because it's combined with sublimation ink to create transfers that infuse directly into the fabric rather than sitting on top. Let's examine the unique aspects of using this type of transfer paper:
- Sublimation ink required: You can't use regular ink with Sublimation Transfer Paper. It requires sublimation ink, which turns into a gas when heat is applied, allowing the design to permeate the fabric.
- Specific fabric types: Sublimation transfers work best with polyester and polyester blend fabrics. The higher the polyester content, the more vibrant and long-lasting the design will be.
- No need for mirroring: Unlike other transfer types, you do not need to mirror your design before printing with Sublimation Transfer Paper. The design infuses directly into the fabric as it appears on the paper.
- No weeding necessary: The sublimation process turns the design into a gas that permeates the fabric, so there's no need for weeding. The design is transferred entirely without leaving residue or film on unprinted areas.
- Heat press application: A heat press is typically the best choice for applying sublimation transfers, as it provides the high, even heat necessary for the sublimation process to work effectively.
DTF transfers
Direct-to-Film (DTF) transfers are the new kid on the block in the world of heat transfer printing. With their superior quality and convenience, they're quickly gaining popularity. Here's what you need to know about using DTF transfers:
- Ink and powder process: DTF transfers use a unique process involving special DTF ink and adhesive powder. This combination allows intricate, high-quality, full-color designs to be printed and transferred without having any white edges on dark color materials.
- No weeding required: Unlike other types of heat transfer paper, DTF transfers do not require weeding, saving you precious time and allowing for more intricate designs without extra effort.
- Compatible with various materials: DTF transfers can be applied to a variety of materials, including cotton, polyester, and blends, providing flexibility in your creative projects.
- Professional quality results: With their vivid color reproduction and durability, DTF transfers deliver professional-quality results that are durable and soft to the touch.
- Heat press application: While we recommend a heat press for applying DTF transfers, the process is less sensitive to pressure inconsistencies, making it more forgiving than other methods.
- Warm peel: Once the heat is applied, DTF is a 'warm peel' process, but can also be peeled cool.
The journey to mastering heat transfer printing is constantly evolving, and embracing new technologies like DTF transfers can lead to stunning results. Ninja Transfers offers a range of high-quality, custom DTF transfers that help our customers take their designs to the next level.
Tips for using heat transfer paper
Unleashing your creativity with heat transfer paper can be a gratifying experience. However, to ensure smooth sailing and top-notch results, it helps to arm yourself with some practical know-how. Here are the top 12 tips to help you on your journey, followed by common issues and troubleshooting.
- Start with a high-quality design: Use high-resolution images with the correct file size, type, and color format. Mirror your design if required for your type of transfer paper.
- Optimize printer software settings: Adjust settings for the type of transfer paper and design you're working with. The correct color profile and print quality setting are crucial.
- Pre-heat your equipment: Before application, pre-heat your heat press, Cricut EasyPress, or home iron for even heat distribution.
- Choose the right fabric/materials: Opt for heat-resistant materials such as cotton, polyester, and blends for the best results.
- Follow manufacturer's instructions: Adhere to application temperature, pressure, and time guidelines for each type of transfer paper.
- Pre-press your fabric: Remove moisture and wrinkles before applying your design for a smoother result.
- Ensure optimal color and resolution: Over-saturating ink can cause bleeding. Aim for balanced colors and maintain quality at 300 DPI.
- Test before you print: Run a test print on regular paper to check the print quality, color accuracy, and layout before using transfer paper. And make sure to read our heat transfer size and placement guide.
- Use a cutting machine for precision: For white heat transfer paper, a Silhouette Cameo or a Cricut can cut right up to the edges of your image.
- Raise the print area: For printing over buttons, seams, or pockets, use a Print Perfect Pad to ensure a firm, flat surface for a quality application.
- Peel correctly: Follow the specific peel requirements of different transfers. Some need to be peeled while warm, others when cold.
- Handle and store carefully: Let printed transfer paper dry completely before handling. Store unused transfer paper in a cool, dry place, away from sunlight and moisture.
Troubleshooting common issues using heat transfer paper
Understanding and troubleshooting common issues can distinguish between a frustrating experience and a smooth, successful project. Here are the top 8 most frequent hurdles encountered when using heat transfer paper and advice on how to overcome them:
- Paper jams or misfeeds: Ensure your heat transfer paper is loaded correctly. If it's jamming or misfeeding, remove any stuck paper, verify that you're using the correct paper type for your printer, and try again.
- Ink smudging or poor print quality: This is often due to incorrect paper type or printer settings. Ensure you're using high-quality inks and that the transfer paper is aligned correctly in the printer. If the issue persists, try different printer settings or test with a different paper brand.
- Transfer not adhering properly: Check your heat press settings to ensure that your temperature, pressure, and timing are all set correctly according to the manufacturer's instructions. Also, ensure the garment is free of lint and wrinkles. If you're ready to step up your game, check out our guide on how to choose a heat press machine.
- Fading or cracking after washing: Always wait at least 24 hours before washing a freshly pressed garment, and turn the garment inside out before washing. If fading or cracking occurs, it may be due to incorrect heat press settings or the quality of the transfer paper or inks used.
- Inconsistent color in the final result: Often due to incorrect printer settings or using inks of poor quality. Ensure you're using the correct color profile on your printer, and consider investing in high-quality inks.
- Transfer paper is challenging to peel: Depending on your paper, it may need to be warm or cool to peel effectively. If you're having difficulty, try adjusting the temperature before peeling.
- Wrinkled or misaligned design: This can happen if the transfer paper moves during application. Make sure the garment and transfer are flat and secure before applying heat.
- Scorching or discoloration of the garment: Lower your heat press temperature. If the garment is heat sensitive or delicate, use a heat transfer cover sheet or a thin cotton fabric to protect it during application.
Frequently Asked Questions
Can I use heat transfer paper on any fabric?
Most heat transfer papers work best on cotton or cotton-blend fabrics. However, certain types may also suit materials like leather, nylon, or synthetic blends. DTF transfer will work on just about any material. Always check the transfer paper's compatibility with your chosen fabric.
Do I need to mirror my design before printing on heat transfer paper?
For light-colored heat transfer papers, yes. The design must be mirrored before printing as it's placed face-down on the fabric. However, the design is not usually mirrored for dark-colored transfer papers since the paper is placed face-up on the material.
How long should I heat press my design onto the fabric?
The time varies depending on the type of heat transfer paper, the fabric you are using, and the heat press method. However, typically, it ranges from 10 to 30 seconds. Always follow the manufacturer's instructions for the best results.
Do I need to pre-wash my fabric before using heat transfer paper?
Pre-washing the fabric can help remove residual sizing or chemicals that might interfere with the transfer's adhesion. It's not always necessary, but it can improve the durability of your design.
Can I use an iron instead of a heat press when using heat transfer paper?
An iron can be used, but it may not provide consistent or professional-looking results as a heat press. Heat presses provide even heat distribution and pressure, essential for a quality transfer. However, with careful technique, you can still achieve good results with an iron, especially for simple designs.
Mastering heat transfer paper
Remember, this newfound knowledge is only the beginning; mastery comes from hands-on experience. Whether you're a savvy small business owner, an artistic individual, or a burgeoning brand, leveraging heat transfer paper can open up a world of customization possibilities. Keep honing your skills, embrace your creative instincts, and relish in the exciting journey towards heat transfer mastery.
![]()
Comments (0)
There are no comments for this article. Be the first one to leave a message!